Set Up PostHog Analytics for Your Website
PostHog shows what visitors actually do on your site. InboundSavvy has it built in: one token, one dropdown. Includes how to connect PostHog's MCP server so your AI assistant can query the data.
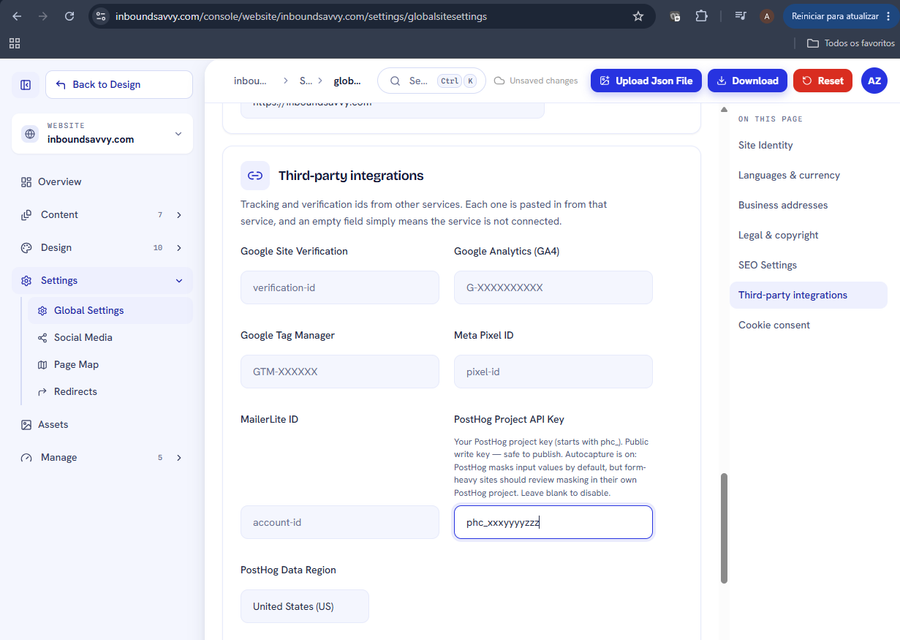
Turning on PostHog takes one token and one dropdown. Everything below is that, in order, plus what to do when it does not work.
PostHog records what visitors actually do on your site: which pages they land on, where they click, and where they give up. InboundSavvy ships with it built in, so there is no code to paste and no plugin to install.
Before you start
You need a free PostHog account. When you sign up it asks whether to store your data in the US or the EU: note which you picked, because you have to match it in step 2 and nothing will arrive if you get it wrong.
Step 1 - Copy your project token
1. Log in to PostHog and open your project.
2. Go to Settings, then Project.
3. Find Project API Token and copy it. It starts with phc_.
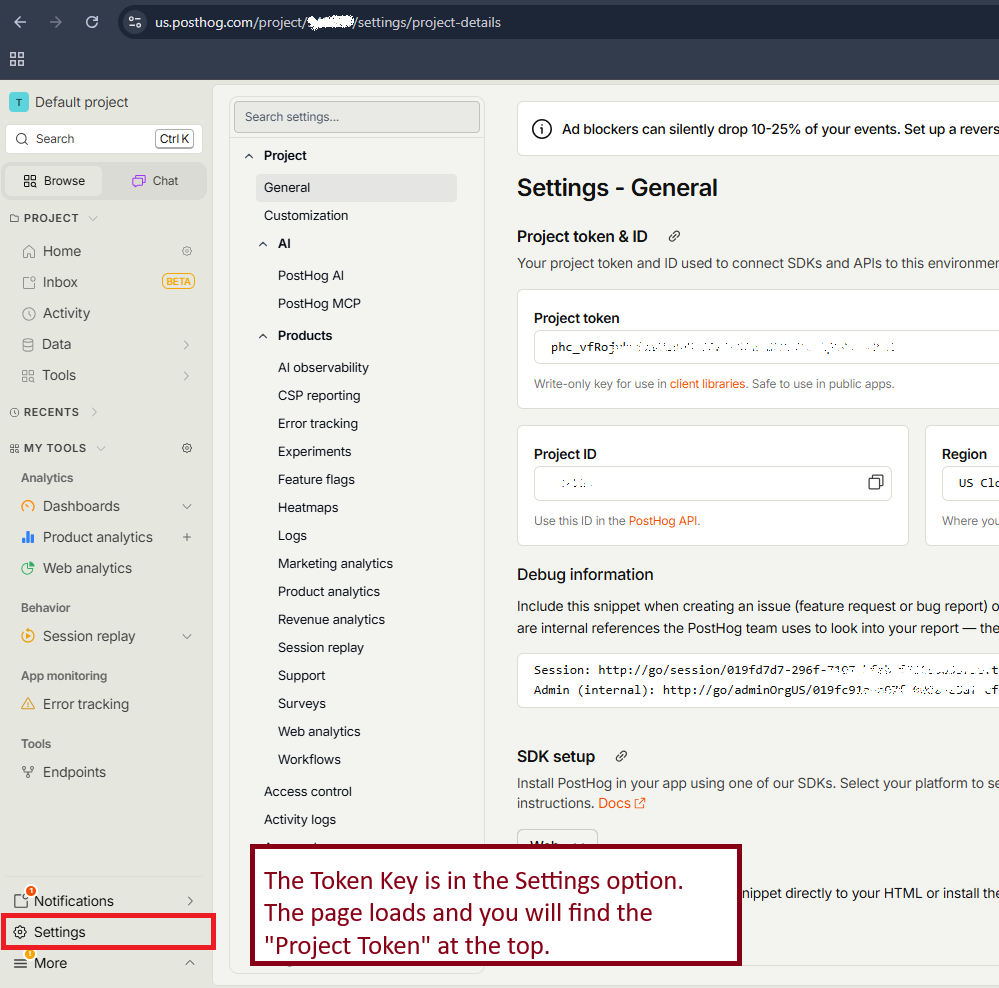
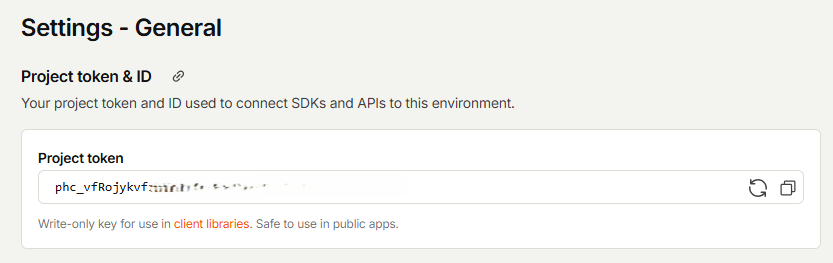
This one is a public write key. It is designed to sit in your website's HTML where anyone can read it, so copying it around is safe. Keep that distinction in mind: the key in the MCP section further down is the opposite, and it is not safe to share.
Step 2 - Paste it into InboundSavvy
1. Open your website in the InboundSavvy dashboard and go to Global Site Settings.
2. Under Third Party IDs, paste the token into the PostHog field.
3. Set Data Region to the one you chose when you signed up.
4. Save.
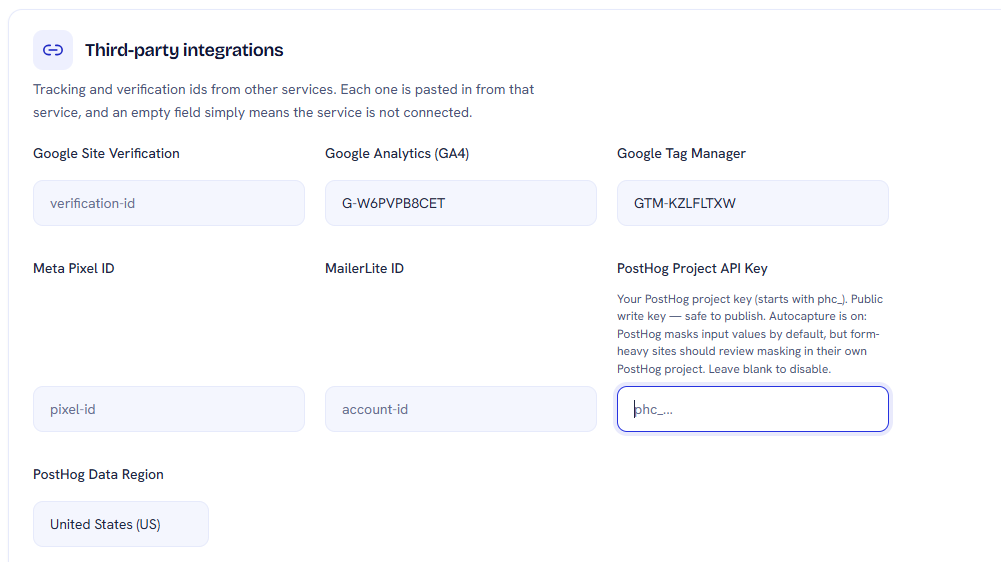
That is the whole setup: one token, one region.
Step 3 - Publish
Saving stores the setting. It reaches your visitors on the next build, so click Publish. Until you do, PostHog is configured and collecting nothing.
Step 4 - Confirm it is working
1. Open your live site and click through a few pages.
2. In PostHog, open Activity.
3. Your own visit should appear within a minute or so.
Events showing up means you are done.
Good to know
- It tracks automatically. Page views and clicks are captured without you tagging anything by hand.
- It respects consent. PostHog sits behind the cookie banner, so visitors who decline analytics are not tracked.
- It is the free tier of a category that usually is not. Session replay, funnels, and heatmaps are what teams pay FullStory for. PostHog gives a small business the same instruments at a price a small business can reach.
Ask your analytics questions in plain English
PostHog runs a hosted MCP server, so the AI assistant you already use can query your analytics directly. You ask "which pages did people leave from last week" and it answers. There is nothing to install: the server is PostHog's, and you point your assistant at it.
This needs a different key from the one above. The project token is a public write key. A personal API key can read your data, so it belongs on your own machine and never in your website.
Get a personal API key
1. In PostHog, click your avatar and open Settings.
2. Find Personal API keys and click Create personal API key.
3. Name it something you will recognise in six months, for example "Claude MCP".
4. Give it read scopes only, on the one project you want to query. You are handing an assistant a key to your data: make the key open as few doors as possible.
5. Copy it. PostHog shows it once and never again.
Point your assistant at the server
Add this to your assistant's MCP configuration. For Claude Code that is ~/.claude.json; other assistants use the same shape:
{
"mcpServers": {
"posthog": {
"type": "http",
"url": "https://mcp.posthog.com/mcp",
"headers": { "Authorization": "Bearer YOUR_PERSONAL_API_KEY" }
}
}
}
Restart the assistant so it picks up the new server, then ask it something real: "what were my top ten pages last week". Numbers back means you are connected.
One caveat worth stating plainly: the assistant can only see what PostHog has already recorded. If you installed the token this morning, do not ask it about last quarter.
Not seeing any data?
- Check the token starts with phc_ and has no stray spaces.
- Check the Data Region matches the one you chose at signup. This is the common one.
- Check you published after saving.
- Check you did not decline analytics in your own cookie banner. Everybody does this once.
By Andre de Castro Zorzo
Next in the series
How to fix a website that breaks on a phone
Your desktop rankings are computed from the phone rendering. Google indexes with Googlebot Smartphone, so what a phone cannot reach is not indexable.
2026-08-18
Google picked a different version of your page: fixing duplicate URLs and canonicals
Your page is indexed. Google just indexed a different URL of it than the one you promote and track. Pick one form, redirect the rest, make the signals agree.
2026-08-18
How to find and remove a noindex tag or robots.txt block that keeps your site out of Google
Your site is not missing from Google. It is being refused, on your own instruction. Three mechanisms can issue it, and two leave nothing in your HTML.
2026-08-18
Only your homepage is indexed: how to get Google to find the rest of your site
Google indexes what it can reach. If only your homepage is indexed, your pages are not being outranked: they are not being found. Internal links come first.
2026-08-18
How to get backlinks for a small business
Of the nine reasons your site is missing from Google, links are the one you control least. Fix the other eight first, then claim the links you are owed.
2026-08-18
How to get Google to index a new website
If your site went live in the last few weeks, the likely explanation is the boring one: Google has not got to you yet. What shortens the wait, and what does not.
2026-08-18
How to make your website faster and pass Core Web Vitals
Compressing your images will not fix this. Three numbers decide whether Google calls your site fast, and two are set by your architecture, not your assets.
2026-08-18
How to show up in local Google search when you serve a town
Your website is not your entry on the map. The map pack is fed by a Google Business Profile, a separate record you must claim and verify to compete on it.
2026-08-18
My page is indexed but gets no traffic: how to make it answer the question
Your page is not missing from Google. It is present and unwanted. Search Console tells you which problem you have: not being shown, or shown and not chosen.
2026-08-18Set Up PostHog Analytics for Your Website
PostHog shows what visitors actually do on your site. InboundSavvy has it built in: one token, one dropdown. Includes how to connect PostHog's MCP server so your AI assistant can query the data.
2026-08-05
How to Get Your Small Business Found on Google in 2026
Getting found on Google changed with AI Overviews and AI Mode. Here's what actually moves the needle for a small business in 2026 - in plain English, no jargon.
2026-07-01
Why Isn't My Website Showing Up on Google? (9 Reasons + Fixes)
Nine reasons a small-business site does not appear in Google, each with the exact check that identifies it and the actual repair. Including what Search Console and Lighthouse each tell you, and why they disagree.
2026-06-28
The Small-Business Website SEO Checklist for 2026
SEO for a small business comes down to a handful of things done well. Here's a practical 2026 checklist, grouped by what each item actually does for you.
2026-06-25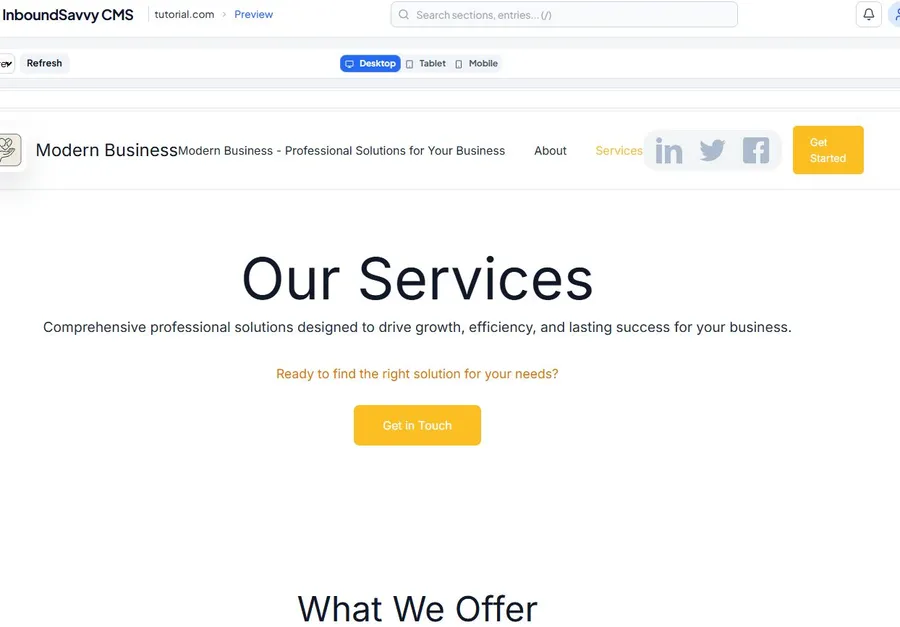
Let Claude Edit Your Website: Connecting InboundSavvy to Claude Code
A non-technical guide to setting up InboundSavvy's MCP integration with Claude Code - one prompt, a few clicks, and AI starts building your website.
2026-05-25Other articles
How to fix a website that breaks on a phone
Your desktop rankings are computed from the phone rendering. Google indexes with Googlebot Smartphone, so what a phone cannot reach is not indexable.
2026-08-18Google picked a different version of your page: fixing duplicate URLs and canonicals
Your page is indexed. Google just indexed a different URL of it than the one you promote and track. Pick one form, redirect the rest, make the signals agree.
2026-08-18How to find and remove a noindex tag or robots.txt block that keeps your site out of Google
Your site is not missing from Google. It is being refused, on your own instruction. Three mechanisms can issue it, and two leave nothing in your HTML.
2026-08-18Only your homepage is indexed: how to get Google to find the rest of your site
Google indexes what it can reach. If only your homepage is indexed, your pages are not being outranked: they are not being found. Internal links come first.
2026-08-18How to get backlinks for a small business
Of the nine reasons your site is missing from Google, links are the one you control least. Fix the other eight first, then claim the links you are owed.
2026-08-18How to get Google to index a new website
If your site went live in the last few weeks, the likely explanation is the boring one: Google has not got to you yet. What shortens the wait, and what does not.
2026-08-18How to make your website faster and pass Core Web Vitals
Compressing your images will not fix this. Three numbers decide whether Google calls your site fast, and two are set by your architecture, not your assets.
2026-08-18How to show up in local Google search when you serve a town
Your website is not your entry on the map. The map pack is fed by a Google Business Profile, a separate record you must claim and verify to compete on it.
2026-08-18My page is indexed but gets no traffic: how to make it answer the question
Your page is not missing from Google. It is present and unwanted. Search Console tells you which problem you have: not being shown, or shown and not chosen.
2026-08-18Set Up PostHog Analytics for Your Website
PostHog shows what visitors actually do on your site. InboundSavvy has it built in: one token, one dropdown. Includes how to connect PostHog's MCP server so your AI assistant can query the data.
2026-08-05How to Get Your Small Business Found on Google in 2026
Getting found on Google changed with AI Overviews and AI Mode. Here's what actually moves the needle for a small business in 2026 - in plain English, no jargon.
2026-07-01Why Isn't My Website Showing Up on Google? (9 Reasons + Fixes)
Nine reasons a small-business site does not appear in Google, each with the exact check that identifies it and the actual repair. Including what Search Console and Lighthouse each tell you, and why they disagree.
2026-06-28The Small-Business Website SEO Checklist for 2026
SEO for a small business comes down to a handful of things done well. Here's a practical 2026 checklist, grouped by what each item actually does for you.
2026-06-25Let Claude Edit Your Website: Connecting InboundSavvy to Claude Code
A non-technical guide to setting up InboundSavvy's MCP integration with Claude Code - one prompt, a few clicks, and AI starts building your website.
2026-05-25