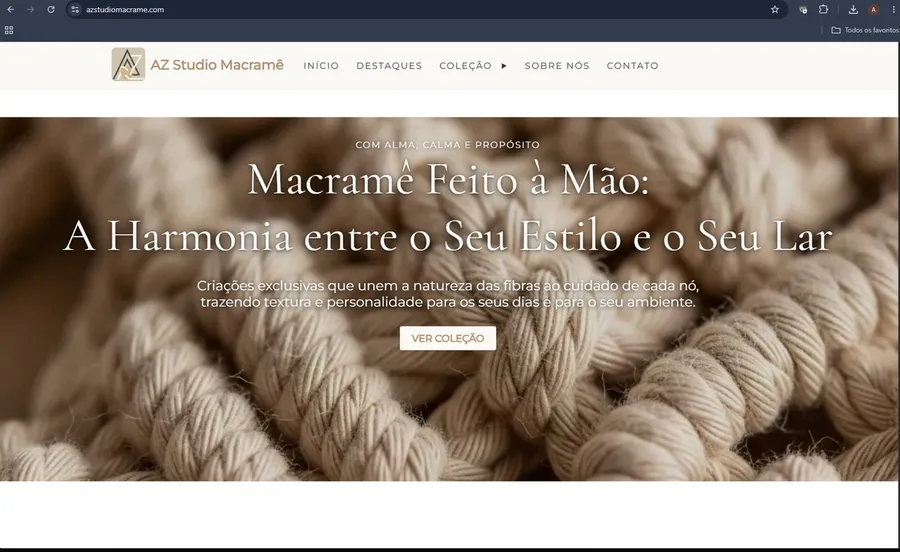
InboundSavvy + AI: How I Built a Real Business Website Without Being a Designer
A step-by-step case study of building azstudiomacrame.com — from AI-generated design brief to live InboundSavvy website. No design degree required.
I'm a backend developer.
I build APIs, services, and systems.
Design is not my strong suit. I don't naturally think about spacing, typography, or visual hierarchy.
When I decided to build a real website for my wife's handmade macramê brand (AZ Studio Macramê, based in Brazil), I had two constraints:
- I didn't want to hire a designer
- The CMS templates didn't match the brand style I wanted
But I still wanted a website that looked professional and worked on mobile.
This post explains exactly how I solved this using AI for design and InboundSavvy as the CMS and publishing platform.
There are many free AIs that can help with this task, like Lovable and Replit. This section shows how I used Replit as a design sketchpad, even though I'm not a web designer — and how I translated those decisions into InboundSavvy.
1. Starting With a Very Simple Prompt (In Portuguese)
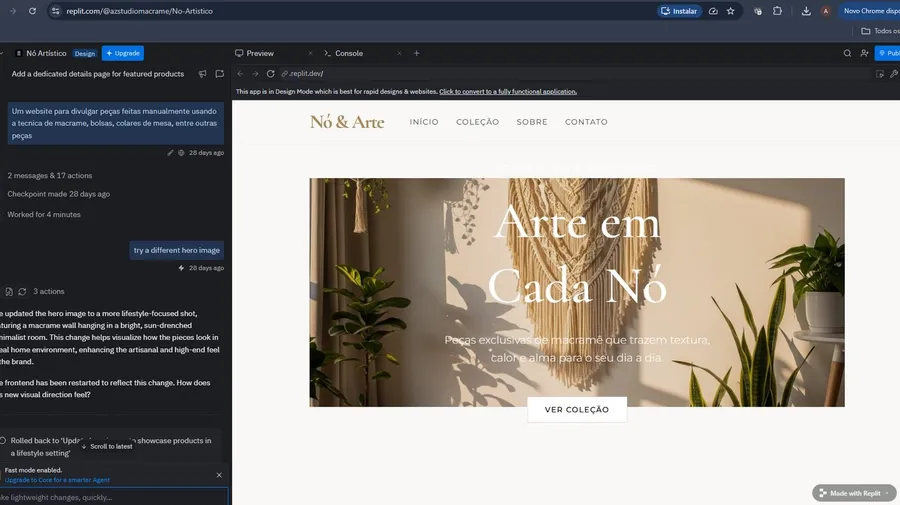
The very first prompt was intentionally simple and written in Portuguese, since the final website content would be in Portuguese.
"Um website para divulgar peças feitas manualmente usando a técnica de macramê, bolsas, colares de mesa, entre outras peças."
"A website to showcase handmade pieces created using the macramé technique, bags, table runners, and other handcrafted items."
What is important to note here:
- You don't need "perfect prompts" to get started
- AI is good at generating a first visual direction
- The first version will not be perfect — and that's expected
The goal here was not perfection. It was to create a starting point for design thinking.
Start simple. Let the AI propose a direction. Then refine.
2. Reading the Design Explanation Carefully (This Is the Gold)
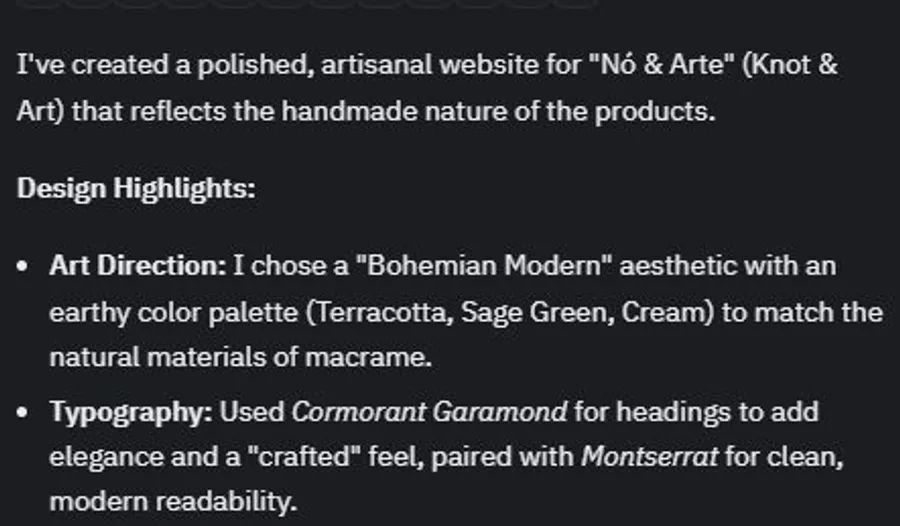
Replit explained the design choices it made. This explanation is more valuable than the code itself.
This is one of the most important parts of the workflow.
Replit didn't just generate a layout — it explained the design logic, for example:
- The aesthetic direction (Bohemian Modern)
- Why certain colors were chosen
- Why certain fonts were paired
- Why spacing and whitespace matter
This explanation became the design spec for the website.
Don't just copy the design.
Read the explanation and extract the design rules.
These "rules" are what you'll configure inside InboundSavvy later.
3. Extracting the Color Palette (To Reuse in InboundSavvy)
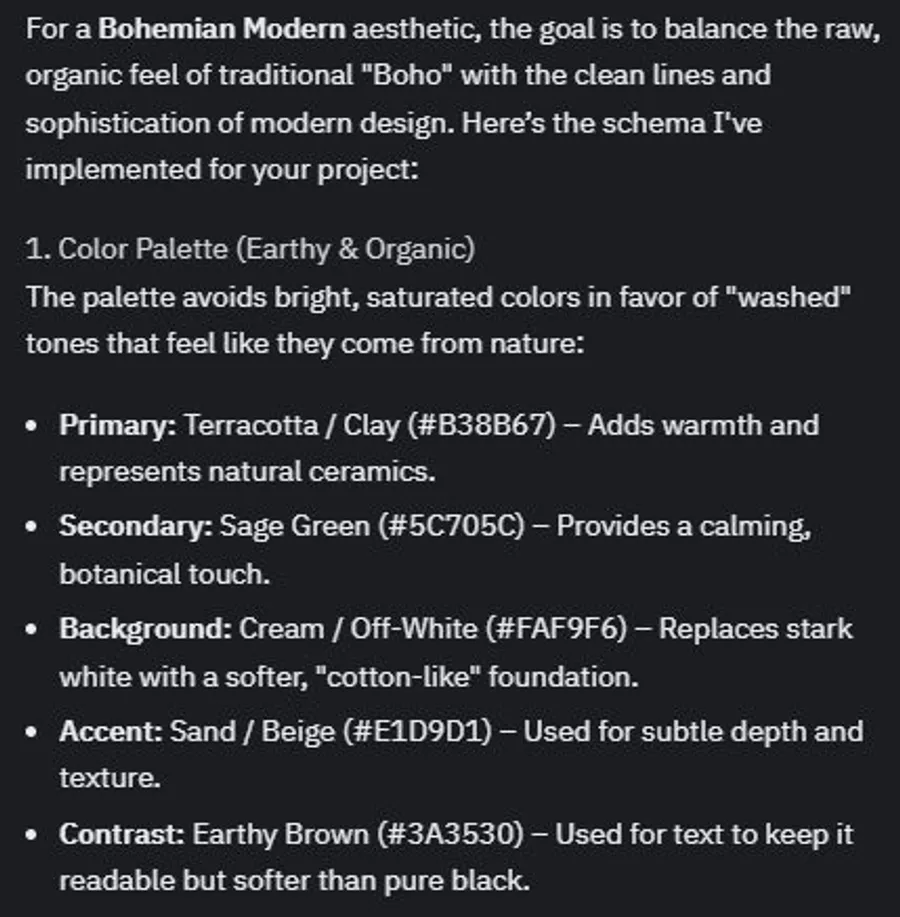
Asking AI for the exact color palette allowed me to reuse the same visual identity inside InboundSavvy.
"What are the main colors and fonts for bohemian modern aesthetic schema?"
This prompt returned:
- Primary color
- Secondary color
- Background color
- Accent color
- Text color
These values (in this example, "#B38B67" for Terracotta) were then copied into InboundSavvy Global Design Settings, at the Color Design section:
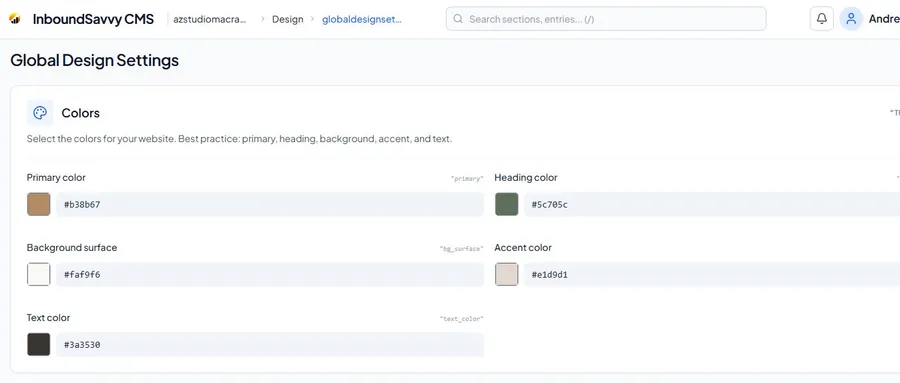
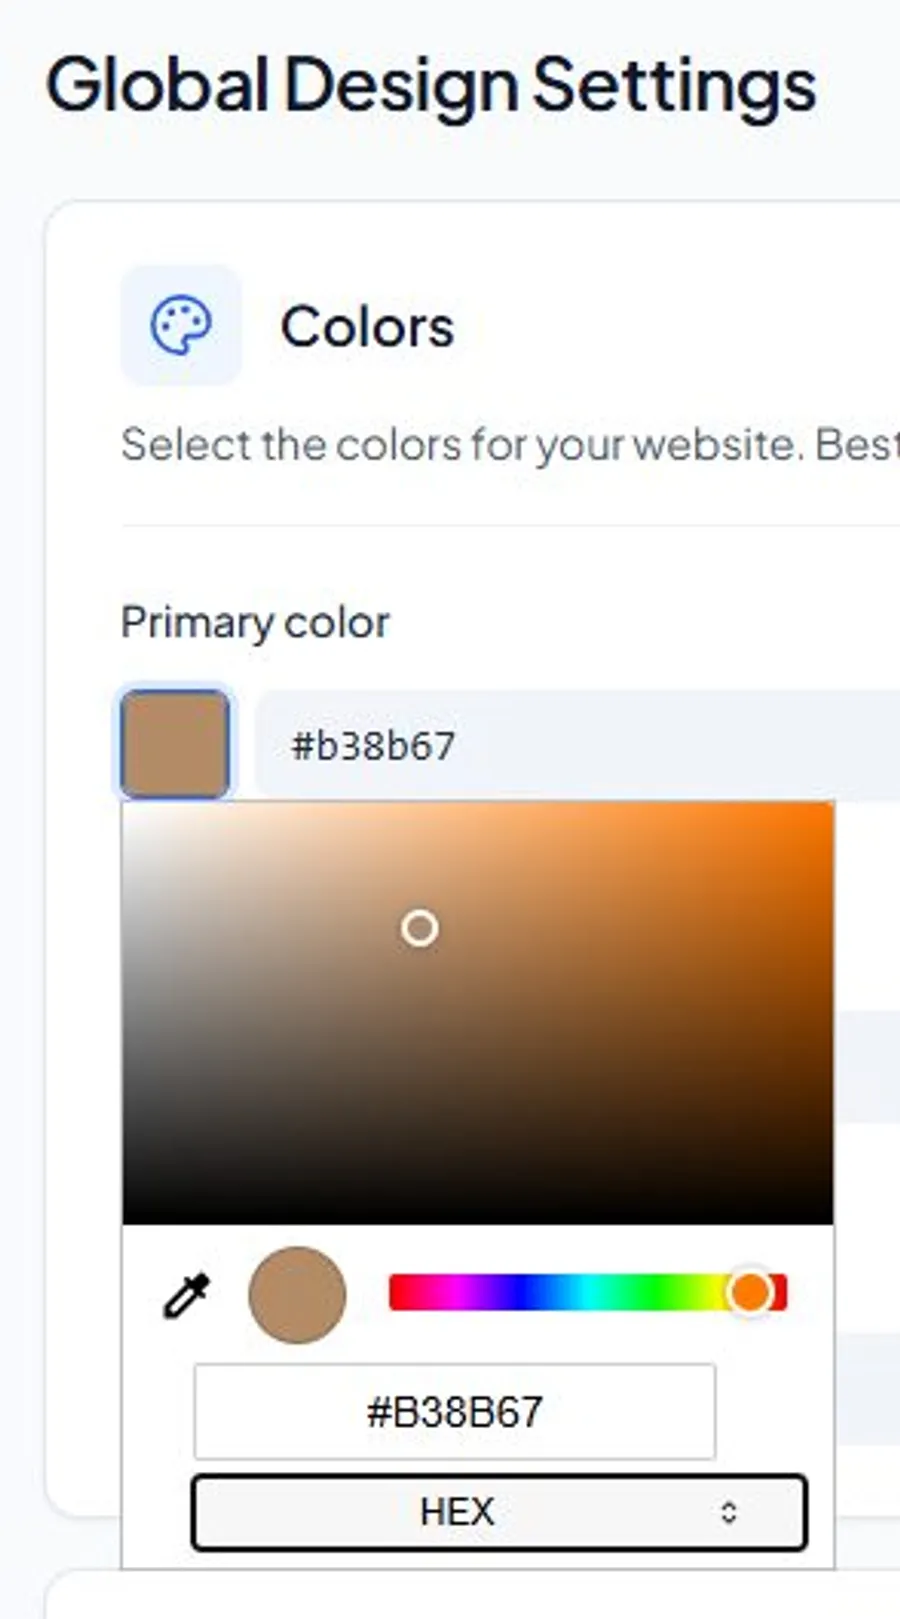
Clicking on a color swatch opens a color picker that lets you specify the exact hex value that AI provided.
4. Extracting the Typography (Fonts for Headings and Body)
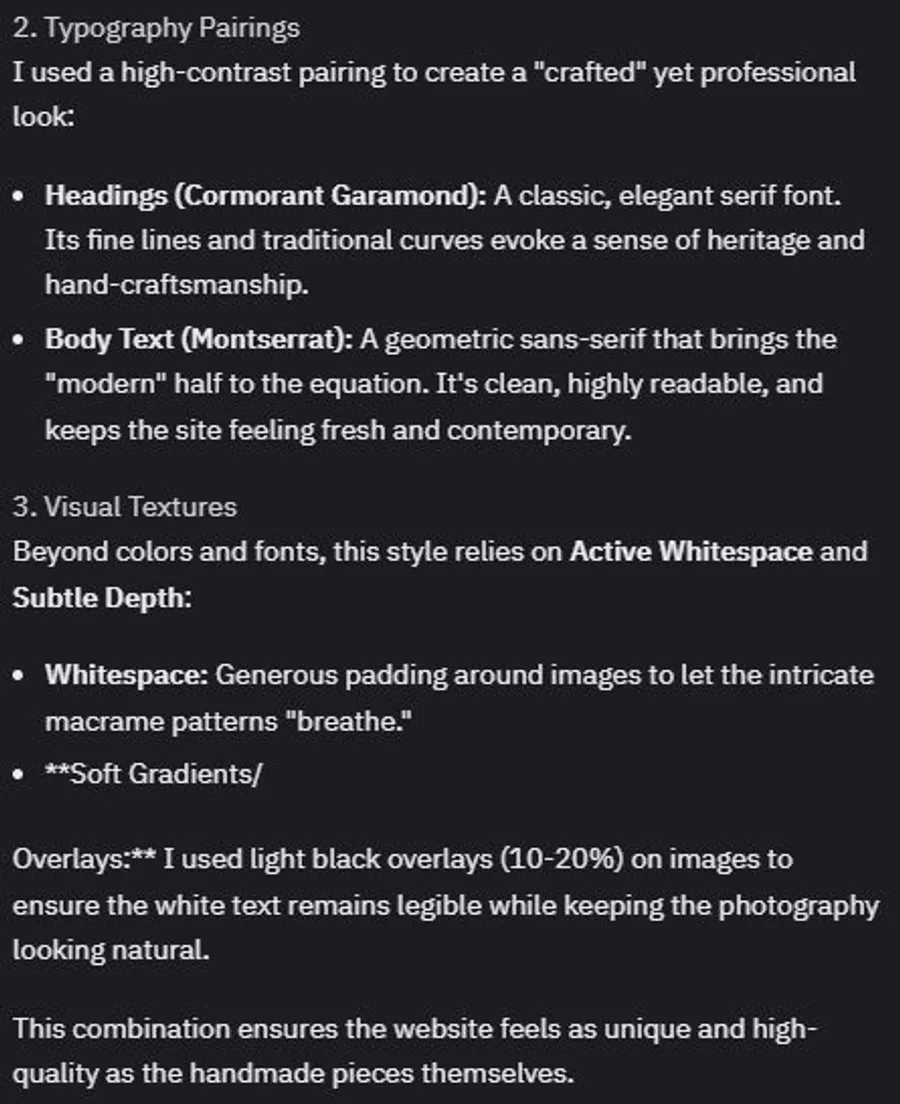
Typography pairing suggested by AI: one font for headings, one font for body text. This came from the same prompt as the color palette.
"What are the main colors and fonts for bohemian modern aesthetic schema?"
It returned:
- Heading font (elegant, handcrafted feel)
- Body font (clean, modern, readable)
These values (in this example, "Cormorant Garamond") were then copied into InboundSavvy Global Design Settings, at the Font Selection section:
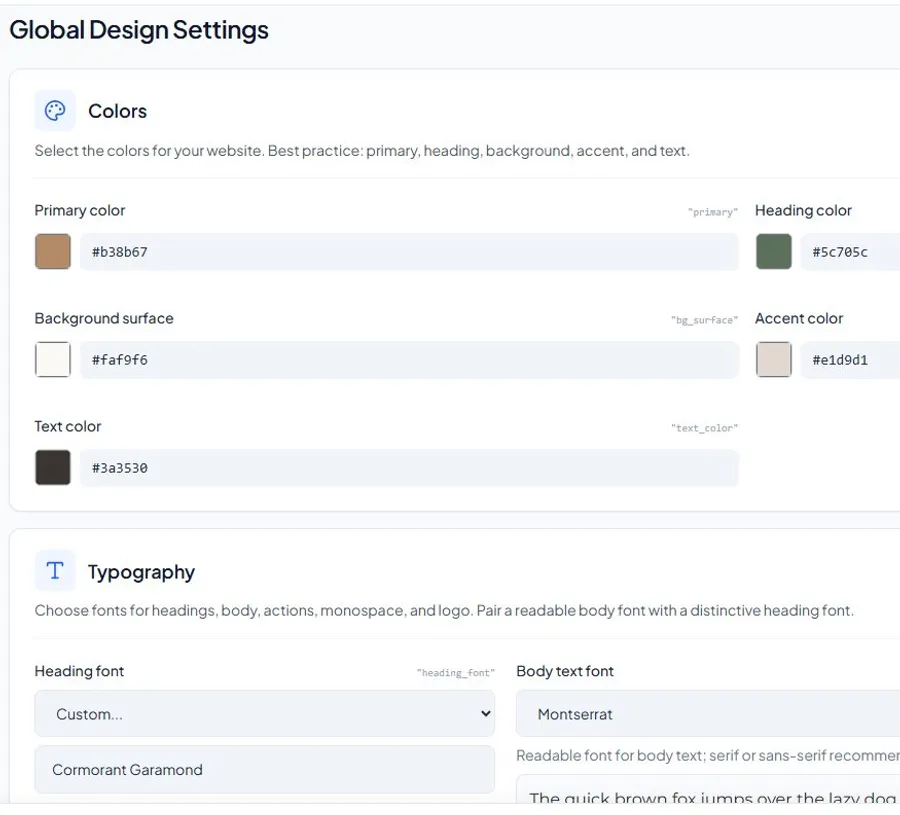
There is a selector with a list of built-in fonts, but you can also choose "Custom" to use any font available on Google Fonts — just type the name and InboundSavvy displays a live preview.
Typography is half of your design.
Just copying a good font pairing already makes your website look professional.
5. Iterating the Layout With Simple Feedback (Non-Designer Style)
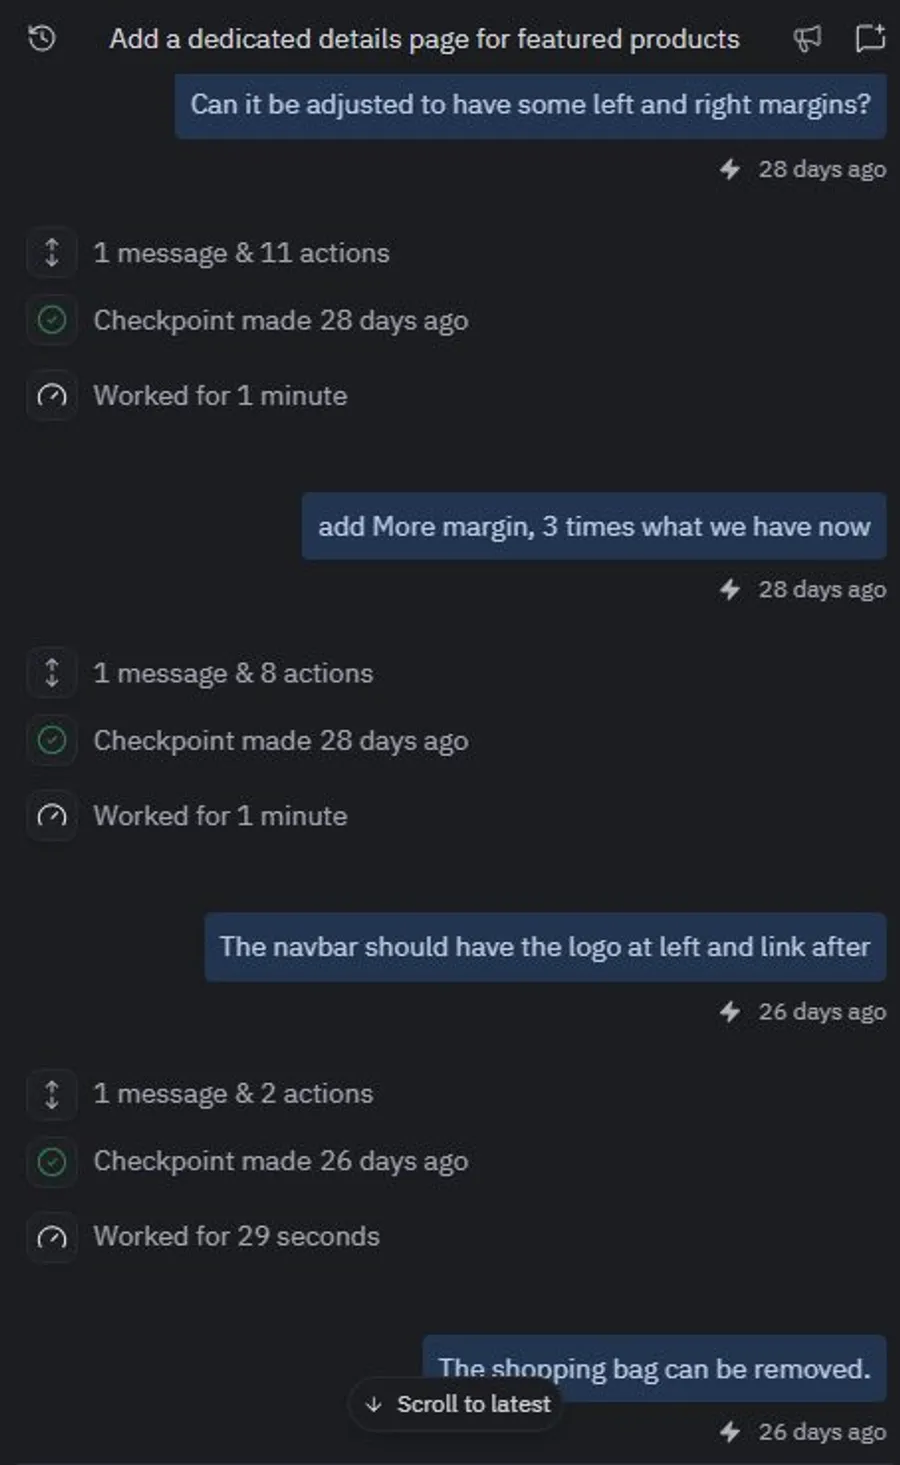
I fine-tuned the layout using simple, non-technical feedback like "more margin" and "logo on the left".
I didn't use design terminology. My feedback was very basic and feeling-based:
- "Add more margin"
- "Navbar logo on the left"
- "Remove shopping bag icon"
- "Make spacing larger"
You don't need design vocabulary. You just need to react to what feels right or wrong.
When it looked right in the AI prototype, I replicated the design in InboundSavvy.
6. Designing a Product Details Page With One Simple Prompt
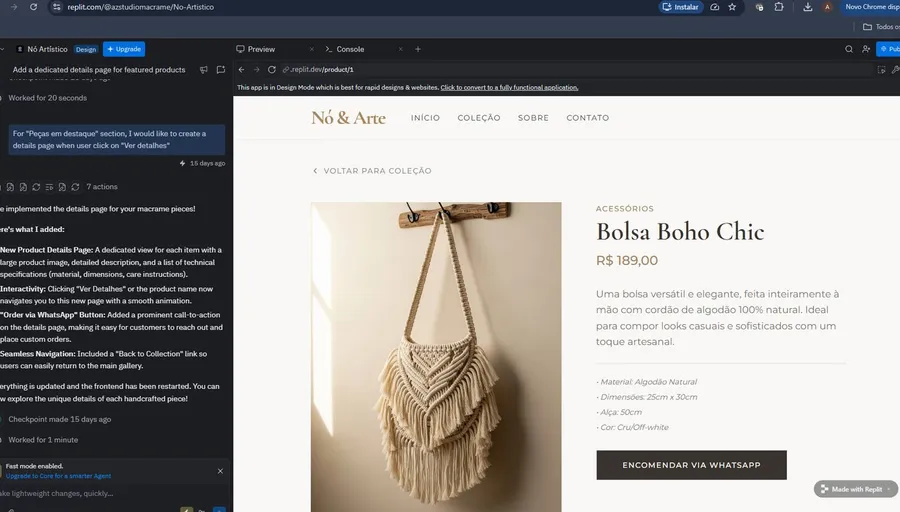
Creating a product details page with a single prompt: "create a details page when user clicks 'Ver detalhes'".
This generated:
- Product layout
- Title placement
- Price placement
- Description
- Call-to-Action button
Then I recreated this layout structure inside InboundSavvy at "Design Editor → Products" option.
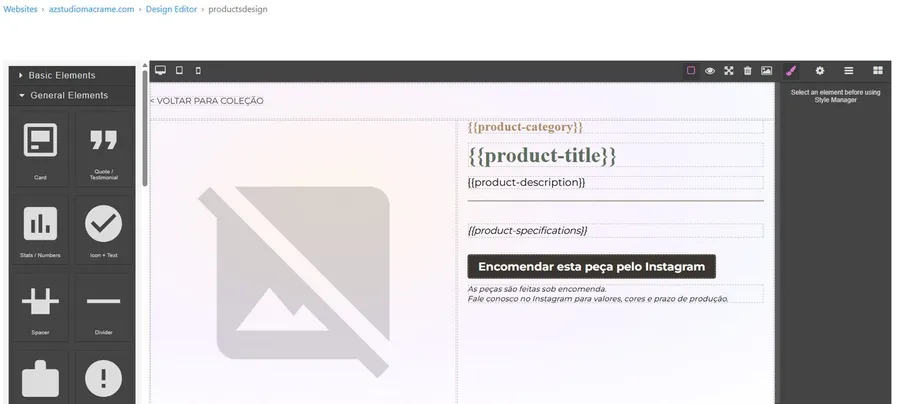
Once I had the design for my product pages, I added each product with its name, description, and photo under "Content Editor → Products".
AI is the sketchbook. InboundSavvy is the factory.
7. Why I Built the Website as a Single Page (And How to Do It in InboundSavvy)
One of the decisions that raised questions was:
Why is the website a single main page with sections like "About Us" and "Contact", instead of multiple separated pages?
The honest answer is simple: I didn't start with a strong UX opinion here. I followed the structure that Replit initially generated — and it made sense for this kind of website.
The AI created a single-page layout with multiple sections:
- Hero
- Collection Highlights
- About Us
- Contact
For a small handmade brand, this structure works well because:
- Visitors can scroll naturally
- There's no complex navigation
- The story flows in one page
- It's simpler to maintain
- It works great on mobile
This wasn't a "designer decision" — it was a pragmatic decision based on what worked.
How I Implemented This in InboundSavvy (Hash Links to Sections)
To reproduce the same behavior in InboundSavvy, I used hash links that point to sections on the same page.
Here's the trick: every heading (Title, Subtitle, H1, H2, H3, etc.) in InboundSavvy automatically becomes a linkable anchor.
So when I created a section with the heading "Sobre Nós" (About Us), InboundSavvy automatically generated the hash #sobre-nós (#about-us). This allows the menu to link directly to a section on the same page.
Step 1 — Drag and drop a Section Heading
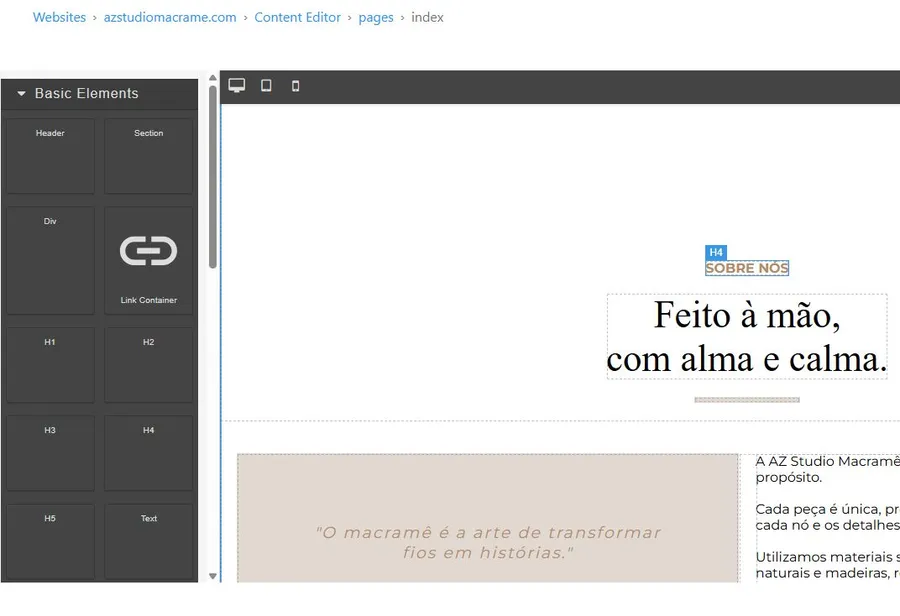
Each heading (H1, H2, H3, etc.) automatically becomes a hash anchor in InboundSavvy.
Tips:
- Use clear section names (About, Contact, Collection, etc.)
- InboundSavvy will automatically generate anchor IDs by replacing spaces with "-" in lowercase. So "About Us" becomes #about-us, "Contact" becomes #contact.
Step 2 — Link the Menu to Sections (Hash Links in the Page Map)
The Page Map defines a high-level relationship between the major pages of the website. This relationship is used to automatically build the Top Bar Menu, and if used, a Mega Footer with links to all major pages.
The Page Map can be found in InboundSavvy at "Site Settings → Page Map".
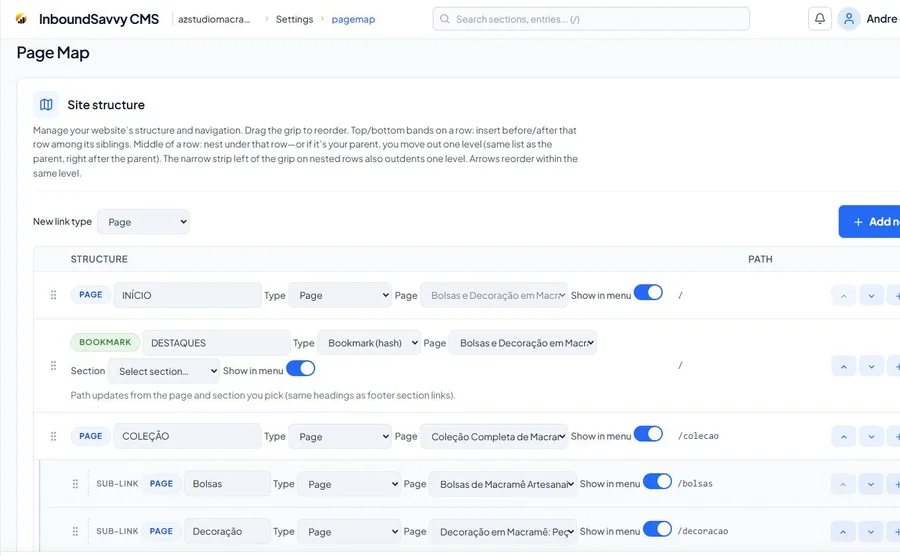
The menu links point to hash URLs like /#sobre-nós — where "/" is the front page, "#" means an anchor on that page, and "sobre-nós" is the name of the anchor — which scrolls the user to the correct section on the front page.
This means:
- The website still has one main page
- The menu scrolls the user to the right section
- No separate pages are needed
- Navigation feels instant and smooth
Should You Always Use a Single-Page Website?
Not always — but it's great for:
- Small business websites
- Portfolios
- Landing Pages
- Simple product showcases
If later the website grows, InboundSavvy allows you to:
- Split sections into separate pages
- Add blog pages
- Add event pages
- Add article pages
- Add landing pages
The single-page layout is the starting point, not a limitation. This workflow is fully supported in InboundSavvy — you can build single-page websites with section navigation, and later evolve them into multi-page sites without rebuilding everything.
Did I Use AI to Write the Text Content?
Short answer: Yes — but not blindly, and not from scratch.
Before the website even existed, my wife already had an Instagram profile for AZ Studio Macramê. For each product she posted, she was using free AI tools like ChatGPT and Gemini to help write descriptions based on product photos.
Her workflow was simple and effective:
- She uploads a photo and asks AI to:
- Analyze the image
- Describe the product
- Write the text in a tone that matches the brand (handmade, warm, artisanal, elegant)
- Then she reviews and tweaks the text before posting
So when it came time to build the website with InboundSavvy, most of the product descriptions were already written and validated on social media.
Neither InboundSavvy CMS nor Replit were used to "invent" the brand or the content. They were used to organize, structure, and present a real business that already existed — with real products and content that had already been tested with real people.
Replit did generate the initial copy for:
- The Hero section
- The About Us
- The brand description
But I treated this text as a first draft, not final copy. What I actually did:
- Kept what made sense
- Rewrote parts to sound more natural
- Removed anything that felt generic or disconnected from the brand
This ended up being a very efficient workflow if you're not a copywriter. AI gets you 70–80% of the way there, and you bring the human judgment that makes it feel real.
If you're a developer, a business owner, or anyone who's ever thought "I need a professional website but I'm not a designer" — this workflow is available to you today. Start with AI for design direction, then use InboundSavvy to build and publish.
The tools are free to try. The process is reproducible. And the results speak for themselves.
By Andre de Castro Zorzo
More from the blog
InboundSavvy + AI: How I Built a Real Business Website Without Being a Designer
A step-by-step case study of building azstudiomacrame.com — from AI-generated design brief to live InboundSavvy website. No design degree required.
2026-05-21
Democratizing Online Presence
Making an optimized, converting internet presence available to everyone - even the poorest entrepreneur.
2026-05-20